
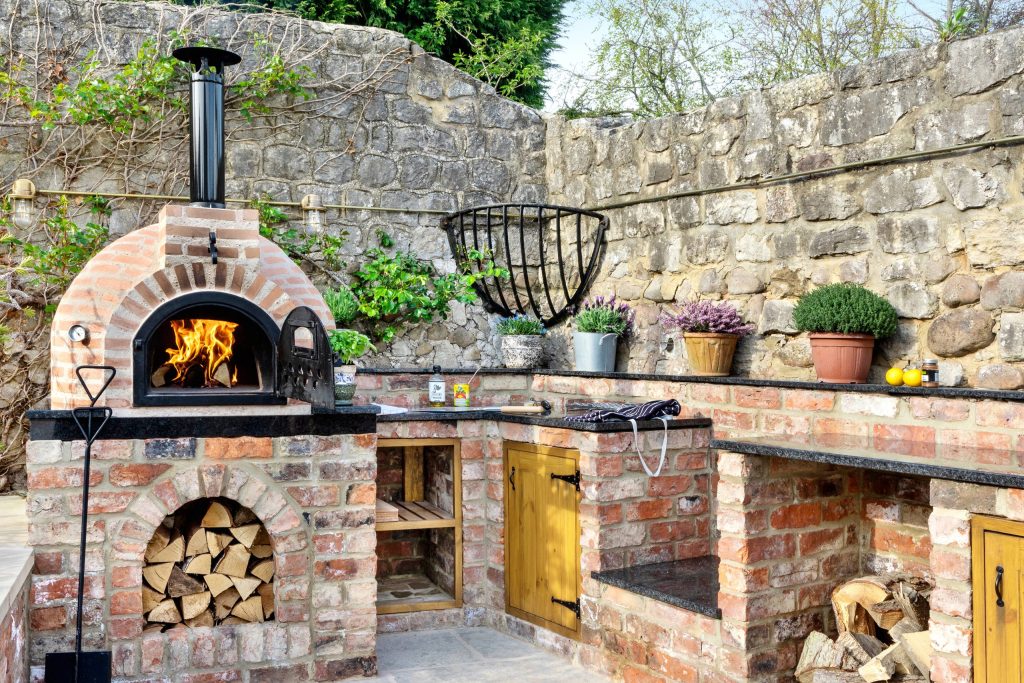
Transform your backyard into an authentic Italian pizzeria with this step-by-step guide to building your own outdoor pizza oven. No masonry experience required!
There’s something magical about gathering around a crackling fire, the aroma of fresh pizza baking, and the satisfaction of creating restaurant-quality meals in your own backyard. Building a DIY outdoor pizza oven might seem intimidating, but with the right approach, it’s an achievable weekend project that will become the centerpiece of your outdoor entertainment space.
Why Build Your Own Outdoor Pizza Oven?
Before we dive into construction, let’s explore why a DIY outdoor pizza oven is worth the effort. Unlike store-bought options that can cost $3,000-$8,000, building your own typically costs between $300-$800 depending on materials and size. More importantly, you’ll create a unique focal point that cooks authentic Neapolitan-style pizza at temperatures reaching 800-900°F – something your indoor oven simply can’t achieve.
The benefits extend far beyond pizza. Your outdoor oven can bake bread, roast vegetables, cook whole chickens, and even function as a smoker when the temperature drops. It’s essentially an outdoor kitchen appliance that brings family and friends together around the ancient ritual of cooking with fire.
Planning Your DIY Outdoor Pizza Oven Project
Choosing the Right Location
Your pizza oven’s location will determine both its functionality and safety. Select a spot that’s at least 10 feet from any structures or overhanging branches. Consider prevailing wind patterns – you don’t want smoke blowing toward your house or seating areas. Ideally, choose a location that’s easily accessible from your kitchen for ingredient transport but positioned to become a natural gathering spot.
The ground should be level and stable. If you’re building on a patio, ensure it can support the oven’s weight (typically 800-1,200 pounds when complete). For grass or dirt locations, you’ll need to create a solid foundation.
Essential Tools and Materials
Foundation Materials:
- Concrete blocks or fire bricks for the base
- Concrete mix for the foundation pad
- Gravel for drainage base
- Rebar for reinforcement
Oven Construction Materials:
- Fire bricks (approximately 50-70 pieces)
- Refractory mortar or high-temperature clay
- Perlite or vermiculite for insulation
- Chicken wire or metal mesh
- Sand for the oven floor base
Tools You’ll Need:
- Level and measuring tape
- Masonry trowel
- Rubber mallet
- Wheelbarrow for mixing
- Safety equipment (gloves, goggles, dust mask)
Step-by-Step Construction Guide
Step 1: Building the Foundation (Day 1)
Start by excavating a 4-foot by 4-foot area to a depth of 6 inches. Fill with gravel and compact thoroughly. This drainage layer prevents frost heaving and moisture issues.
Pour a concrete pad 4 inches thick, reinforced with rebar in a grid pattern. The pad should extend 6 inches beyond your planned oven dimensions on all sides. Allow 24-48 hours for complete curing before proceeding.
Step 2: Constructing the Base Platform
Build your base platform using concrete blocks or fire bricks, creating a structure 30-36 inches high – a comfortable working height for most people. The top surface should be perfectly level and measure approximately 40×40 inches.
Fill the hollow core of concrete blocks with sand or concrete for thermal mass. This thermal mass will help maintain consistent cooking temperatures and retain heat longer.
Step 3: Creating the Oven Floor
Spread a 2-inch layer of sand across your base platform, leveling it carefully. This sand bed will support your fire brick floor. Lay fire bricks in a tight pattern, typically in a herringbone or straight pattern. Use a rubber mallet to ensure each brick sits flush with its neighbors.
The oven floor is critical for even heat distribution. Take time to ensure no gaps exist between bricks, as these can become food traps and create hot spots during cooking.
Step 4: Building the Dome Structure
This is where many DIY builders feel overwhelmed, but there’s a simple solution: the sand form method. Create a dome-shaped sand pile over your brick floor, slightly smaller than your desired internal oven dimensions. A 30-inch diameter dome is perfect for most families.
Cover the sand dome with wet newspaper, then apply a 4-inch thick layer of clay and sand mixture (3:1 ratio). Work in sections, building up the walls evenly. Create a door opening that’s 63% of the dome’s internal height – this ratio is crucial for proper airflow and heat retention.
Step 5: Installing Insulation
Once your dome clay layer has dried for 24 hours, carefully dig out all the sand through the door opening. You now have your oven chamber!
Apply a 4 inch layer of insulation over the entire dome. A mixture of perlite and clay (10:1 ratio) works excellently, providing both insulation and weather protection. This layer keeps heat inside the oven rather than radiating into the atmosphere.
Step 6: Adding Weather Protection
Cover your insulated dome with chicken wire, then apply a final protective layer of clay, sand, and Portland cement. This weatherproof shell protects your insulation from rain and extends your oven’s lifespan significantly.
Consider building a simple roof structure or purchasing a fitted cover for additional weather protection, especially in harsh climates.
Curing Your Pizza Oven Properly
Curing is the most critical step that many DIY builders rush. Start with small fires (newspaper and kindling only) for the first three days, gradually increasing temperature and duration. This slow process prevents cracking by allowing moisture to escape gradually from the clay and mortar.
Week one should involve daily small fires of increasing intensity. By week two, you can begin cooking simple items like bread. Full pizza-making temperature (800°F+) should wait until week three.
Your First Pizza: Tips for Success
When you’re ready to cook, build your fire directly on the oven floor using dry hardwood. Oak, hickory, and fruitwoods provide excellent flavor and burn cleanly. Allow 45-60 minutes for the oven to reach cooking temperature.
Push coals to one side of the oven and use an infrared thermometer to check floor temperature. For pizza, you want 700-800°F. At this temperature, pizzas cook in 90 seconds to 2 minutes.
Use a long-handled peel dusted with semolina flour to slide pizzas in and out quickly. The key to great pizza is having everything prepared before you open the oven door – cheese grated, toppings ready, and dough shaped.
Maintenance and Troubleshooting
Regular maintenance keeps your oven functioning optimally. After each use, allow the oven to cool completely, then brush out ash and food debris. Check for small cracks in the dome and repair them promptly with high-temperature mortar.
If you notice uneven cooking, your oven floor may have developed gaps between bricks. Remove the affected bricks, re-level the sand base, and relay them with fresh mortar.
Seasonal maintenance includes checking the weather protection layer and reapplying as needed, especially after harsh winters or extreme weather events.
Beyond Pizza: Maximizing Your Oven’s Potential
Your outdoor pizza oven’s versatility extends far beyond Italian cuisine. As temperatures drop after pizza cooking (around 500°F), it’s perfect for roasting whole chickens, vegetables, or fish. At 350-400°F, bake artisan breads that develop incredible crusts impossible to achieve indoors.
Lower temperatures (250-300°F) are ideal for slow-cooking stews, smoking meats, or dehydrating fruits and vegetables. Many oven owners plan cooking sessions to utilize the full temperature range, starting with high-heat pizza and ending with overnight bread baking.
Cost Breakdown and Money-Saving Tips
Building your own outdoor pizza oven typically costs:
- Foundation materials: $100-150
- Fire bricks and mortar: $200-300
- Insulation materials: $75-100
- Miscellaneous supplies: $50-100
- Total: $425-650
Compare this to commercial outdoor pizza ovens ranging from $2,000-8,000, and the savings become clear. To reduce costs further, source used fire bricks from demolished kilns or fireplaces, buy materials in bulk, and consider sharing resources with neighbors undertaking similar projects.
Conclusion: Your Gateway to Outdoor Culinary Adventures
Building a DIY outdoor pizza oven transforms more than just your backyard – it changes how you think about cooking and entertaining. The process itself becomes a family project, creating memories alongside the structure that will host countless future gatherings.
While the construction requires patience and attention to detail, the skills needed are well within reach of most DIY enthusiasts. The result is a unique outdoor cooking appliance that increases your property value while providing years of delicious meals and memorable experiences.
Start planning your build today, and by next month, you could be hosting pizza parties that your friends and family will talk about for years to come. Your backyard will never be the same – and neither will your cooking.