Creating an outdoor bar doesn’t have to drain your wallet or require professional carpentry skills. With some creativity, basic tools, and smart material choices, you can build a stunning outdoor bar that becomes the centerpiece of your backyard entertainment space. Whether you’re working with a small patio or a sprawling deck, these budget-friendly DIY outdoor bar ideas will help you create the perfect spot for serving drinks and hosting memorable gatherings.
Why Build Your Own Outdoor Bar?
Building your own outdoor bar offers several advantages over purchasing pre-made options. You’ll save hundreds or even thousands of dollars compared to buying a ready-made outdoor bar, and you can customize the size, style, and features to perfectly match your space and entertaining needs. Plus, there’s nothing quite like the satisfaction of serving drinks from a bar you built with your own hands.
The key to successful DIY outdoor bar projects lies in choosing the right materials for your climate and skill level. Focus on weather-resistant materials that can withstand your local conditions while staying within your budget constraints.
Planning Your DIY Outdoor Bar Project
Before you start building, take time to plan your outdoor bar project thoroughly. Measure your available space and consider how the bar will fit into your overall outdoor entertaining area. Think about the bar’s primary functions – will it mainly serve drinks, or do you want space for food prep as well?
Consider the bar’s proximity to your house for easy access to electricity and plumbing if needed. Most DIY outdoor bars don’t require plumbing, but having electrical access nearby can be helpful for lighting, blenders, or small appliances. Also think about storage needs for bottles, glasses, and bar tools.
Choose a level location that’s easily accessible from your main entertaining area. The bar should feel like a natural extension of your outdoor living space, not an afterthought tucked into a corner.
Essential Tools and Materials
Most DIY outdoor bar projects require basic tools that many homeowners already own or can borrow. You’ll typically need a drill, circular saw or miter saw, level, measuring tape, and basic hand tools like screwdrivers and wrenches.
For materials, focus on weather-resistant options that fit your budget. Pressure-treated lumber, cedar, and composite decking materials work well for outdoor bars. Avoid materials that aren’t designed for outdoor use, as they’ll deteriorate quickly in the elements.
Don’t forget about hardware – use galvanized or stainless steel screws, bolts, and brackets to prevent rust and corrosion. These may cost slightly more upfront but will ensure your bar lasts for years.
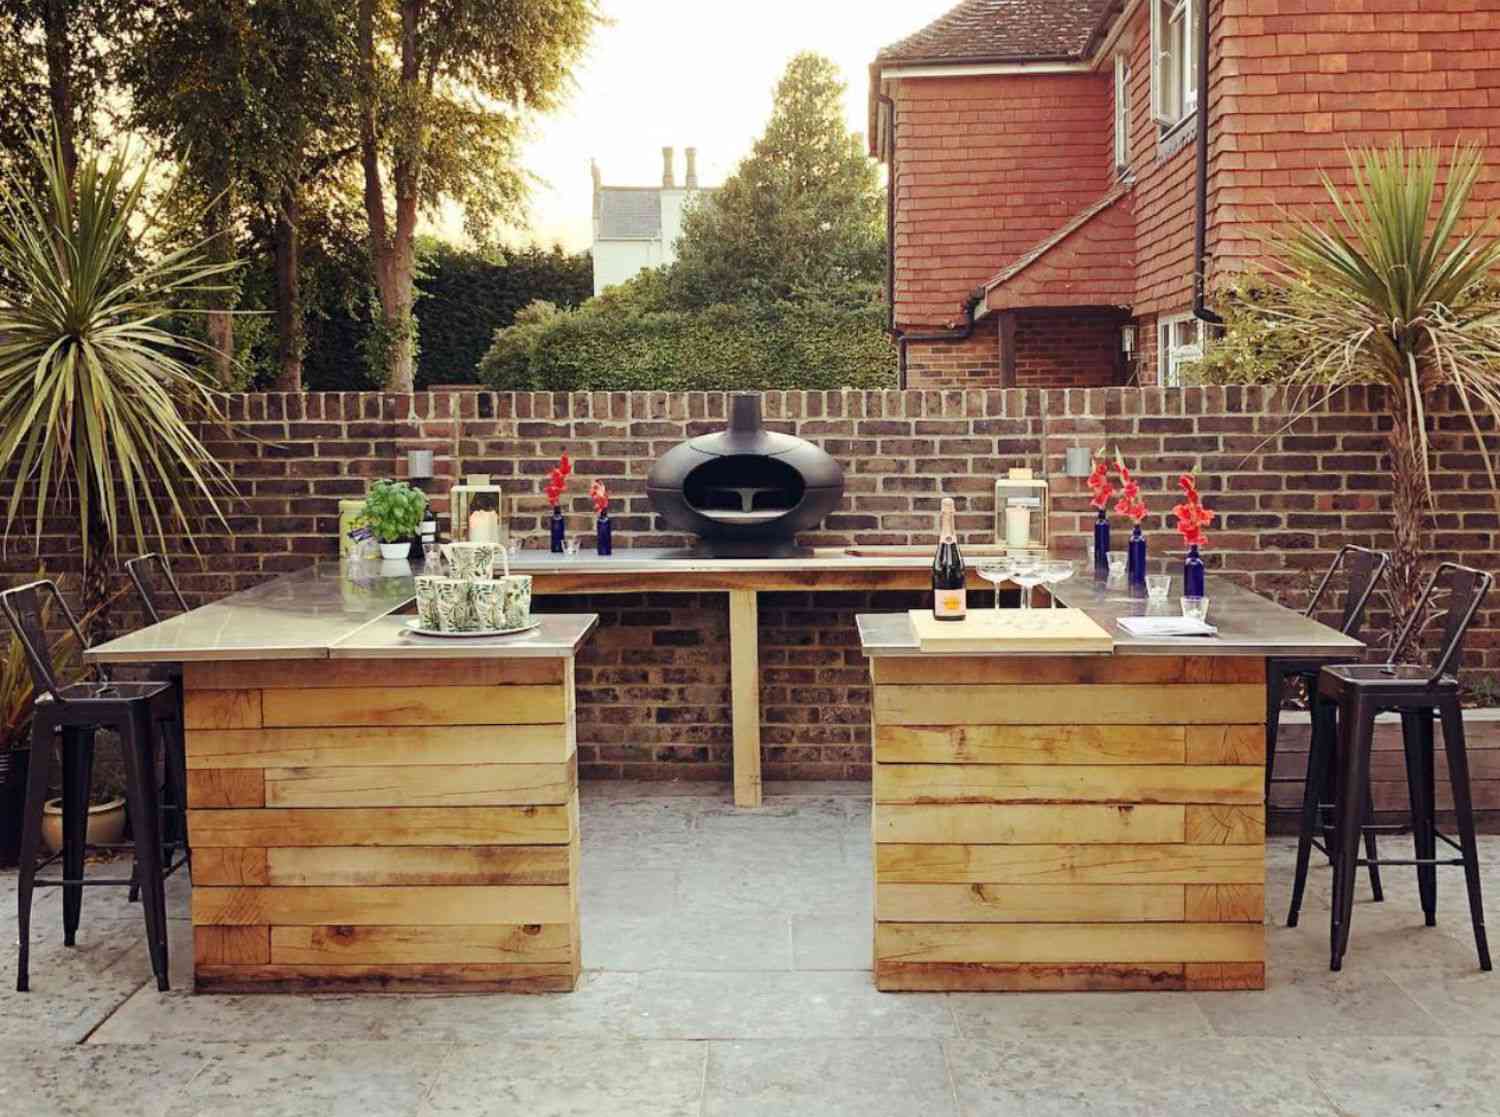
Budget-Friendly DIY Outdoor Bar Ideas
1. Pallet Bar Paradise
Wooden pallets offer one of the most budget-friendly approaches to building an outdoor bar. Many businesses discard pallets regularly, and you can often find them for free or very low cost. Choose pallets in good condition without broken boards or protruding nails.
To create a pallet bar, start by sanding the pallets smooth to prevent splinters. You can leave them natural or apply a weather-resistant stain for a more finished look. Stack and secure two pallets vertically for the bar base, then add a horizontal pallet or piece of plywood for the countertop.
Add a higher back section using another pallet positioned vertically behind the main bar. This creates space for hanging bar tools, string lights, or decorative elements. The natural gaps in pallet construction provide built-in storage for bottles and glasses.
Finish your pallet bar with a weather-resistant sealant or outdoor wood stain. Consider adding casters to the bottom for mobility, or build a simple roof structure overhead for shade and protection.
2. Repurposed Furniture Bar
Transform old furniture pieces into unique outdoor bars with some creativity and basic modifications. An old dresser, sideboard, or even a large desk can become the foundation for a charming outdoor bar.
Start by removing any drawers and interior components to create open storage space. Sand the entire piece and apply a primer designed for outdoor use, followed by weather-resistant paint or stain. Add a new countertop using outdoor-rated materials like tile, stone, or weather-resistant wood.
Consider adding wheels or casters for mobility, especially if you want to move the bar for different occasions or store it during harsh weather. Install hooks on the sides for hanging bar tools, and add battery-powered LED strip lights inside for evening ambiance.
This approach works especially well with vintage or antique pieces that add character to your outdoor space. The key is choosing furniture with good bones – solid construction that can handle outdoor conditions with proper preparation.
3. Cinder Block and Wood Combination
Cinder blocks paired with wooden planks create a sturdy, modern-looking outdoor bar at a fraction of the cost of custom construction. This design is perfect for those who want a permanent installation that can handle heavy use.
Create the bar base by stacking cinder blocks in your desired configuration. The blocks provide both structure and storage, as bottles and supplies can be stored in the hollow centers. Use construction adhesive between blocks for additional stability.
Top the cinder block base with thick wooden planks, such as 2×12 pressure-treated lumber or reclaimed wood planks. Secure the wood to the blocks using construction adhesive and screws driven into wooden inserts placed in the cinder block holes.
This design allows for easy customization – paint the cinder blocks to match your outdoor decor, or leave them natural for an industrial look. Add a footrest rail between the lower blocks for comfort, and consider building matching bar stools using the same materials.
4. Portable Cart Bar
A wheeled bar cart offers maximum flexibility for outdoor entertaining. Build a simple rectangular frame using pressure-treated 2×4 lumber, then add shelving, a countertop, and heavy-duty wheels.
The frame construction is straightforward – create a rectangular base, add vertical supports at each corner, and install a top frame. Add horizontal shelves at different heights for storage, and top with a weather-resistant countertop material.
Choose wheels rated for outdoor use and capable of handling the weight of a fully loaded bar. Locking wheels prevent unwanted movement when the bar is in use. Add a towel bar on one side and hooks for bar tools on the other.
This portable design is perfect for renters or those who want to store their bar during off-seasons. The cart can easily move from deck to patio to lawn depending on where you’re entertaining.
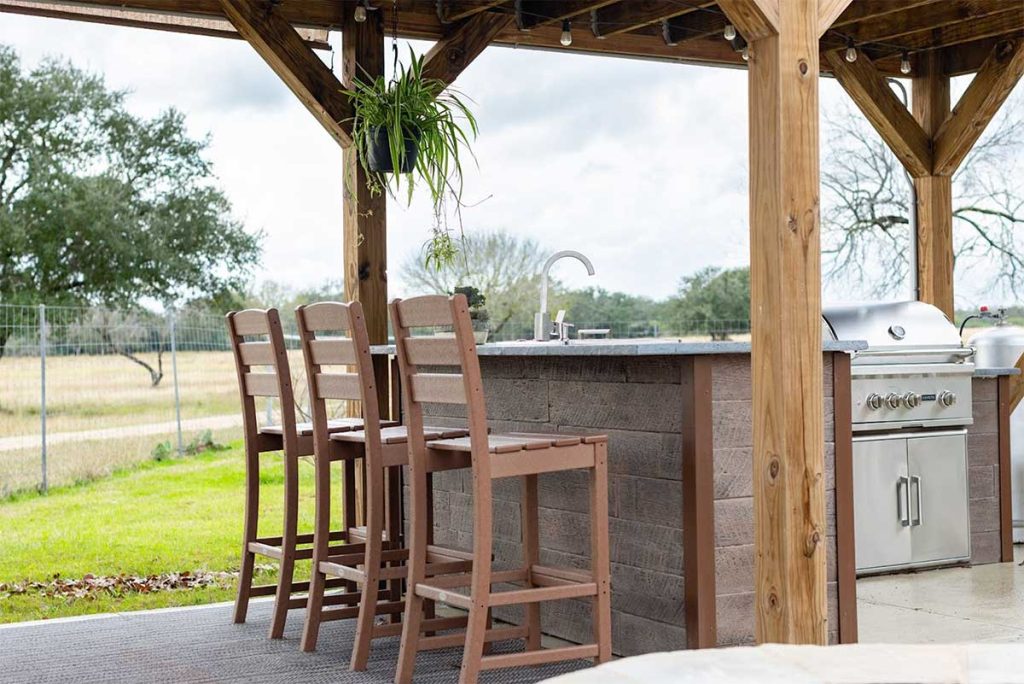
5. Built-In Deck Bar
If you have an existing deck, consider building a bar that integrates seamlessly with the structure. This approach often costs less than standalone bars because you can utilize the deck’s existing framework and materials.
Design the bar to match your deck’s railing height and style. Use the same decking material for the countertop to create a cohesive look. Build the bar structure against the deck railing or in a corner where it won’t interfere with traffic flow.
Include storage compartments beneath the bar top for supplies, and add electrical outlets if possible for small appliances or lighting. Consider incorporating planters on either side of the bar for a integrated landscape design.
This approach works especially well for wrap-around decks where the bar can occupy a corner or straight section that isn’t needed for seating or circulation.
Money-Saving Tips for DIY Outdoor Bars
Shop for materials during off-season sales when lumber and outdoor supplies are typically discounted. Many home improvement stores offer significant savings on outdoor materials in fall and winter.
Consider using reclaimed or recycled materials for character and cost savings. Old barn wood, salvaged doors, or repurposed metal can add unique personality to your bar while reducing costs.
Start with basic functionality and add features over time. You can always upgrade your bar with additional storage, lighting, or decorative elements as your budget allows.
Join online communities and forums where DIY enthusiasts share tips, plans, and sometimes even materials. Many experienced builders are happy to share advice that can save you time and money.
Don’t overlook free or low-cost materials from construction sites, home renovations, or businesses that regularly discard usable materials. Always ask permission before taking materials, and inspect everything carefully for safety and usability.
Weatherproofing Your DIY Outdoor Bar
Proper weatherproofing ensures your outdoor bar will last for years despite exposure to sun, rain, and temperature changes. Start with quality materials designed for outdoor use, then add appropriate protective finishes.
Apply a high-quality outdoor wood stain or paint to all wooden components. Choose products specifically formulated for your climate – areas with intense sun need UV-resistant finishes, while regions with heavy rainfall require enhanced water resistance.
Pay special attention to joints and connections where water might penetrate. Use exterior-grade construction adhesive and caulk to seal gaps and prevent moisture infiltration.
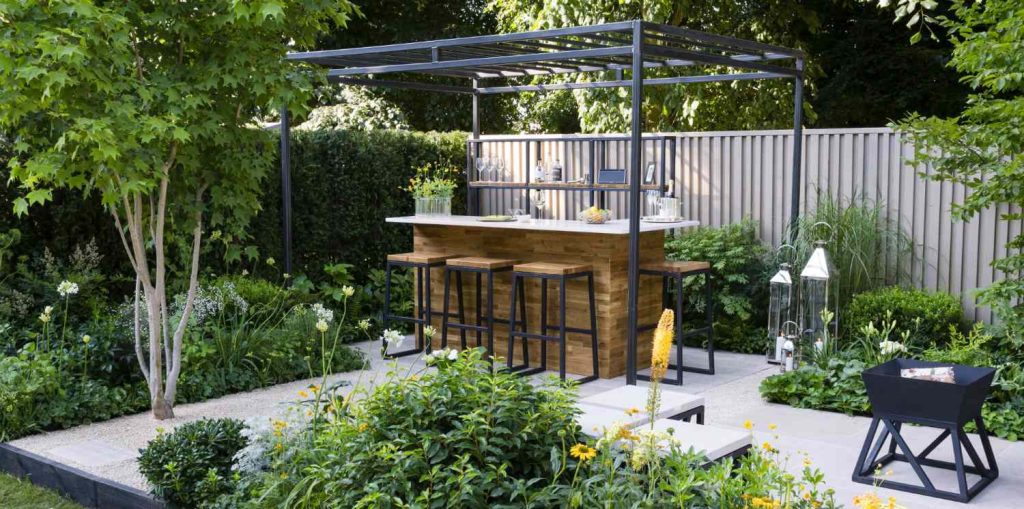
Consider adding a simple roof or covering to protect your bar from direct precipitation. Even a basic awning or pergola can significantly extend your bar’s lifespan while adding visual appeal.
Plan for drainage around your bar area to prevent water from pooling around the base. Proper drainage prevents rot and extends the life of your structure.
Storage Solutions for Your Outdoor Bar
Effective storage makes your outdoor bar more functional and enjoyable to use. Plan for different types of storage including bottles, glassware, bar tools, and supplies.
Built-in shelving provides the most efficient use of space. Install shelves at varying heights to accommodate different bottle sizes and bar accessories. Use weather-resistant plywood or composite materials for shelving that won’t warp or deteriorate.
Consider enclosed storage areas with doors to protect glassware and supplies from dust and weather. Simple cabinet doors can be made from the same materials as your bar for a cohesive look.
Add hooks and hanging storage for frequently used items like bottle openers, jiggers, and towels. Magnetic strips work well for holding metal bar tools and can be hidden under overhangs or inside storage areas.
Think about temperature control for beverages. While a full refrigeration system might be beyond your budget, you can include space for coolers or design the bar to accommodate a small beverage refrigerator in the future.
Lighting Your DIY Outdoor Bar
Good lighting extends your bar’s usability into evening hours and creates ambiance for outdoor entertaining. Battery-powered LED options offer the most flexibility for DIY outdoor bars without electrical access.
String lights create instant atmosphere and are easy to install on any bar design. Choose outdoor-rated lights with weather-resistant connections. Solar-powered string lights eliminate the need for electrical connections entirely.
Under-counter LED strips provide task lighting for mixing drinks and food preparation. Battery-powered versions with remote controls offer convenience without complicated wiring.
Consider accent lighting to highlight your bar’s best features. Solar spotlights can illuminate the bar structure itself, while small LED lights inside storage areas make it easier to find supplies.
For permanent bars with electrical access, low-voltage landscape lighting systems offer professional results with easier installation than standard household wiring.
Seating Options for Your Outdoor Bar
Comfortable seating completes your outdoor bar setup and determines how many people can enjoy your space simultaneously. DIY bar stools can be built using the same materials and techniques as your bar for a coordinated look.
Simple bar stools can be constructed using the same cinder block and wood combination as your bar. Add cushions or outdoor pillows for comfort, and consider back support for longer conversations.
Repurposed materials work well for creative seating solutions. Old tractor seats, vintage chairs, or industrial stools can add character while keeping costs down.
For portable bars, consider stackable stools that can be stored easily when not in use. Commercial outdoor bar stools are available at various price points and eliminate the need for additional construction.
Height is crucial for comfortable bar seating. Standard bar height is 42 inches, requiring stools around 30 inches tall. Counter height bars at 36 inches work with 24-inch stools.
Maintenance and Care
Regular maintenance keeps your DIY outdoor bar looking great and functioning well for years. Establish a seasonal maintenance routine that addresses your local climate challenges.
Clean your bar regularly with appropriate products for your chosen materials. Wood surfaces benefit from periodic cleaning with wood cleaners, while metal components may need rust prevention treatments.
Inspect all hardware annually and replace any corroded screws, bolts, or brackets. Tighten loose connections and address any structural issues promptly to prevent larger problems.
Reapply protective finishes as needed based on your climate and usage. Most outdoor wood finishes need renewal every 1-2 years, while quality stains may last longer.
Cover or store portable elements during harsh weather or off-seasons. Even weather-resistant materials benefit from protection during extreme conditions.
Plan for seasonal deep cleaning and any necessary repairs during off-peak times when the bar isn’t needed for entertaining.
Conclusion
Building a DIY outdoor bar on a budget is an achievable project that adds significant value to your outdoor entertaining space. With careful planning, smart material choices, and basic construction skills, you can create a custom bar that rivals expensive commercial options at a fraction of the cost.
The key to success lies in starting with a solid plan, choosing appropriate materials for your climate, and focusing on functionality over complexity. Begin with a basic design and add features over time as your skills and budget allow.
Remember that the best outdoor bar is one that fits your specific needs, space, and entertaining style. Whether you choose a simple pallet design or a more elaborate built-in structure, the satisfaction of serving drinks from a bar you built yourself makes every gathering more special.
Take your time during the planning phase, invest in quality materials where they matter most, and don’t hesitate to start with a basic design that you can upgrade later. Your DIY outdoor bar will become the centerpiece of countless memorable gatherings with family and friends.